Installed Advance/Premium Running Boards on 2011
 04-09-2012, 11:01 AM
#1
Burning Brakes
Thread Starter
Installed Advance/Premium Running Boards on 2011
This isn't rocket science, but I just wanted to share some thoughts on my install. I did this alone in 3 hours and the instructions from Acura are pretty clear as is but there were a few things that I did differently that really helped.
Instructions available here:
LinkDeny
I got my Advance boards from Tim for a very good price and he had them on my doorstep in under a week. Highly recommended vendor for anything OEM.
In addition to the running boards and hardware, here are the tools you'll need to make this easy (this is in the instructions too):
So on to the random pictures...
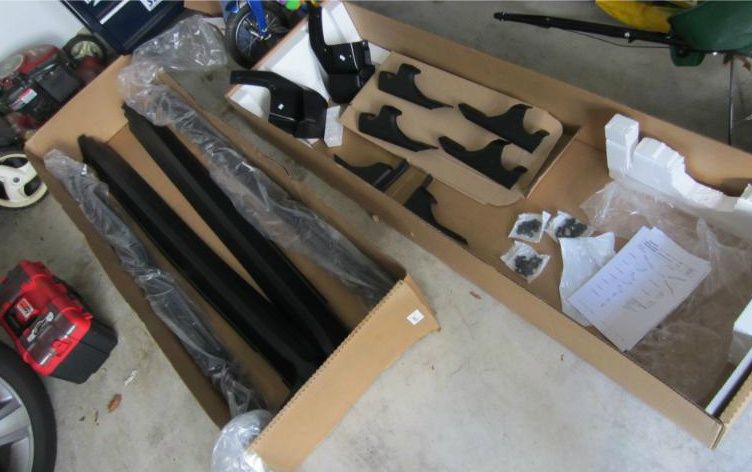
Make sure you have everything:
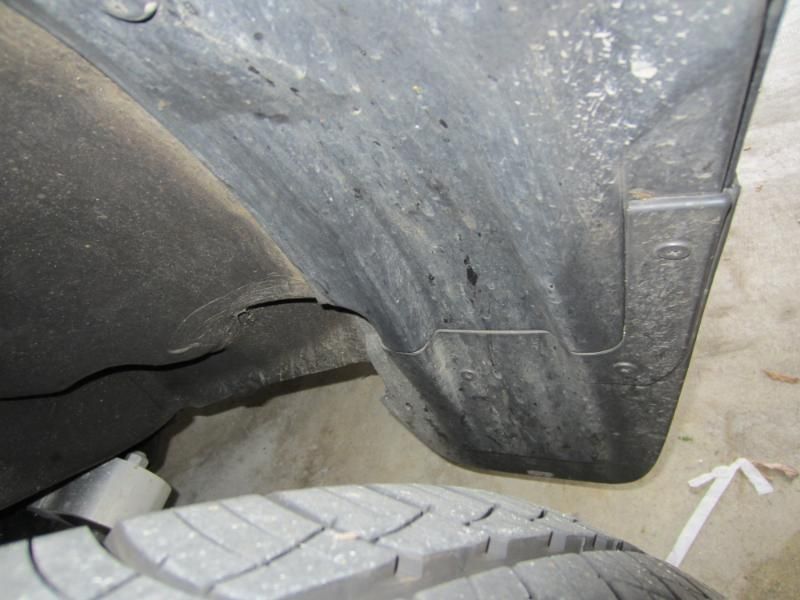
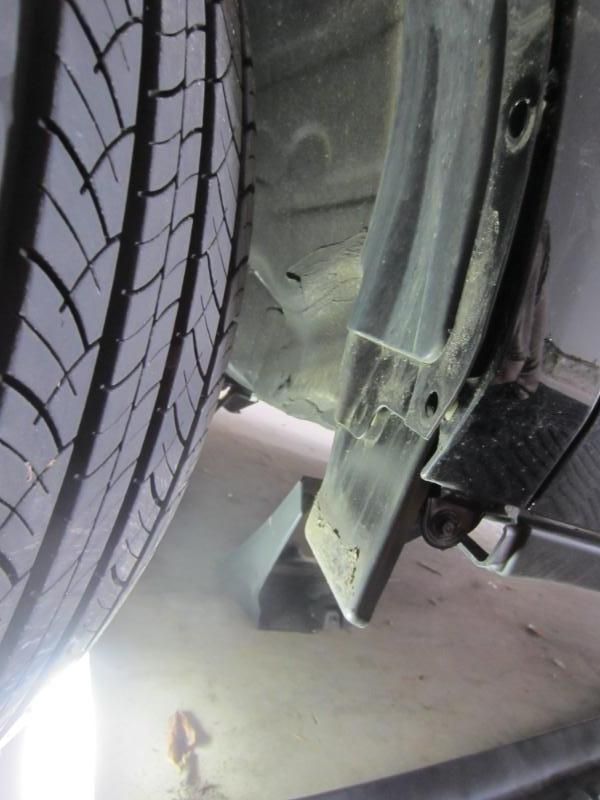
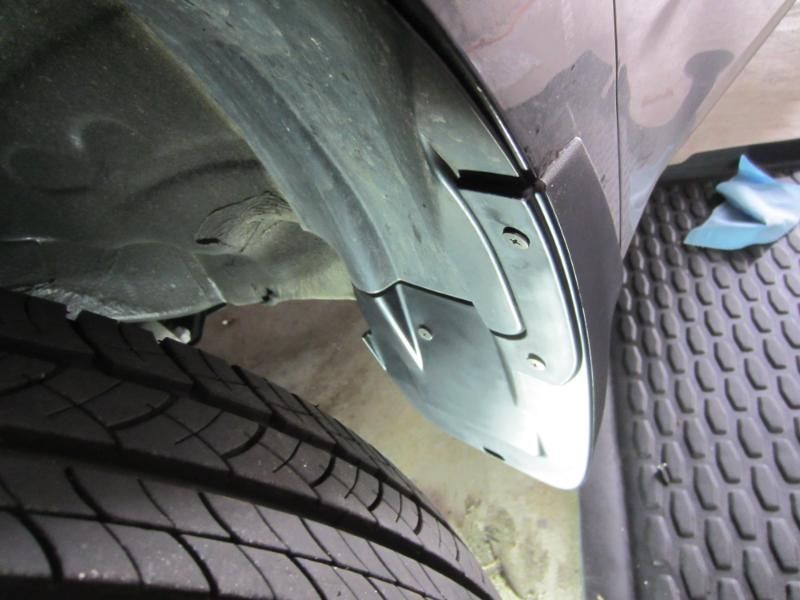
If you're working on the left side, turn your wheels full lock to the right for access to the splash guard, this shows three of the screws to remove from the left splash guard, there is another one in the back that you can't see and another one below:
Splash guard removed:
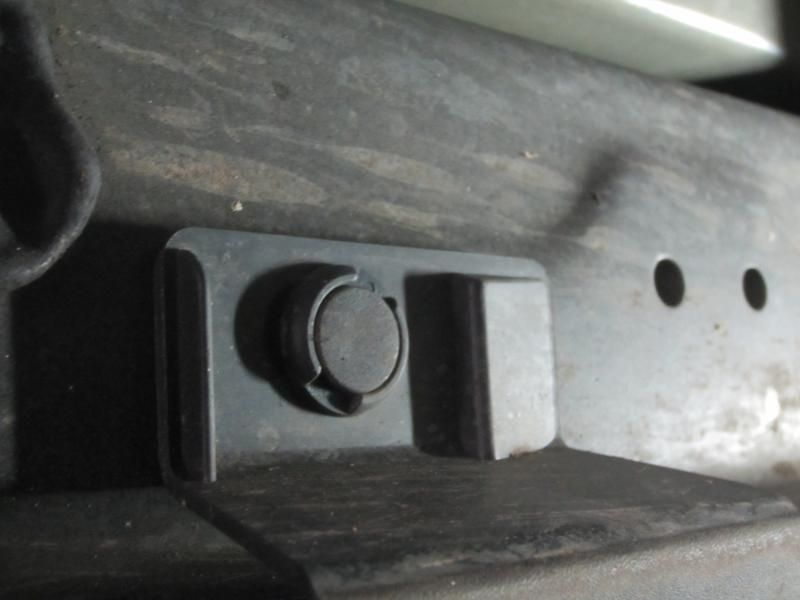
Next is to remove the sill panel or trim piece along the side, and as a start you need a flat head screw driver or clip removal tool to pop these clips out:
Remove screw at the rear of the panel:
Then use your flat head or clip removal tool to unfasten this white lip from the underneath (it's the white thing on the left). It is located towards the front of the trim panel, it is the first clip essentially. It's pretty tight, so don't be afraid to put some juice on it, front of the car is to the right in the picture:
Now once that first clip is undone, the instructions say to pull the front part of the panel out and slide the entire panel piece forward to disengage from the remaining clips in order to remove. What they don't tell you is that the clips hold the panel in pretty well, so you really have to tug hard on it (forward, not out) in order to get it out. The first I did took me forever because I wasn't sure how much force to exert.
Once the piece is out, you'll see all the white clips used to hold it in place (don't mind the manly beverage), and these are to be removed because the new sill panel comes with its own clips:
Another noteworthy point - the new sill piece has the same white clips, but during shipping, some of them may fall off out of their brackets because they are just slid on. Inspect your sill panel to make sure every bracket has a white clip. If not, look around the plastic bag the trim came in or in the box to see if any have fallen out and replace where necessary. If you have a few missing that really are lost, you can always reuse some of those you just took off the car. It's not a huge deal, but if one of the white clips towards the ends of the trim are not in, it may not stay nicely against the car. If it's one of the middles, it probably doesn't matter that much. Once the panel is on the car, it's a pain to get it off if you want to reinstall a missing clip
Per the instructions, press in the new panel, making sure all the clips are pressed in firmly and that everything clicks in place. Reuse the screw at rear that was removed previously:
The running boards came with new splash guards, pretty similar really:
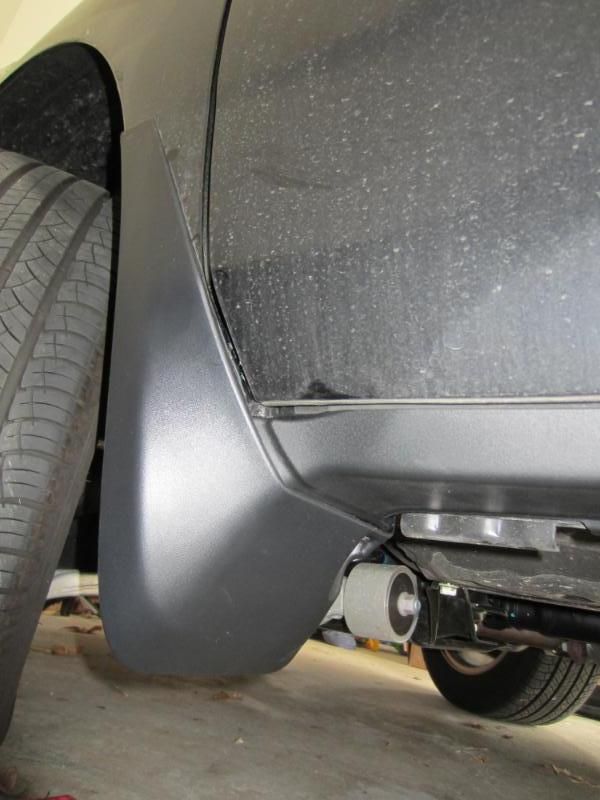
When attaching the new splash guard, it does help to tighten in the order than the instructions say to use. Also, make sure the splash guard is seated properly around the end of the sill panel (and yes, I should have cleaned the car first):
Now for the brackets and running boards. Previous threads/posts on the install say that it is easier to install the brackets on the boards first, while the instructions say to install the brackets on the car first. When I did these for my Pilot, I did brackets on car first, then propped the boards up on small boxes and was able to secure them to the brackets with no issues. In this case, I decided to try the brackets-on-boards method first, and it worked as well, but either way you choose to do this, you need either a second set of hands or something else to help hold the boards up to the car while you bolt things down. The one thing I did differently this time was that I found it was easier to attach the front bracket on the car first, and the rear two on the board. That way, along with using my tool box to prop the board up in the rear, there is support for the board when you go to bolt it up.
Nothing really interesting in this picture, just shows the brackets attached to the board beforehand:
Another tip to note, all the brackets have slotted holes both to attach the brackets to the car and to the boards themselves. If you are picky like me, and want the boards perfectly parallel with the edge of the car/sill, you'll need to make sure that when you tighten everything down, everything is in line. The slotted holes make that challenging, but I basically pushed everything, bracket and boards, inwards, as tight to the car as possible, then tightened everything up. That worked for the right, but not the left, which was slight crooked with the rear out more than the front, so I loosened the hardware and slid the front out a tad (since the slotted holes allow for a little adjustment) and retightened to get everything parallel.
Finally, the instructions say to center the boards based on measurements from the sides and middle. However, since my boards are really for my 6 and 3 year olds to climb in and out of the car, I slid them as far back as possible and bolted it down that way.
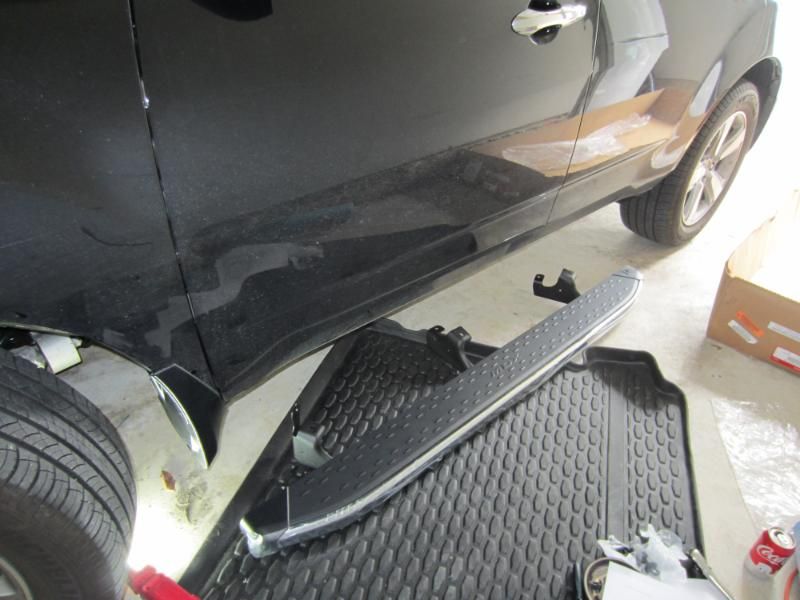
Before:

After:
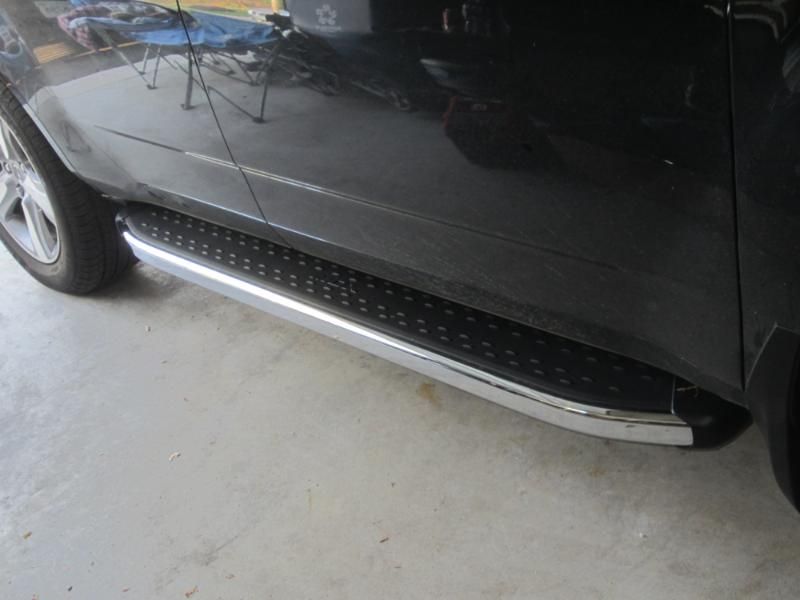
I'll have to get better pictures once the car is cleaned up, but you guys already know what an MDX with running boards looks like.
Hope someone else finds this useful.
Instructions available here:
LinkDeny
I got my Advance boards from Tim for a very good price and he had them on my doorstep in under a week. Highly recommended vendor for anything OEM.
In addition to the running boards and hardware, here are the tools you'll need to make this easy (this is in the instructions too):
- Flat head screwdriver (or the proper clip removal tool)
- Stubby/short Phillips head screwdriver or Phillips attachment for a ratchet
- Torque wrench
- 10 mm and 13 mm socket and/or ratcheting wrenches of the same sizes
- Something to prop one end of the boards up when you need to attach them to the brackets/car, if you're doing this alone
So on to the random pictures...
Make sure you have everything:
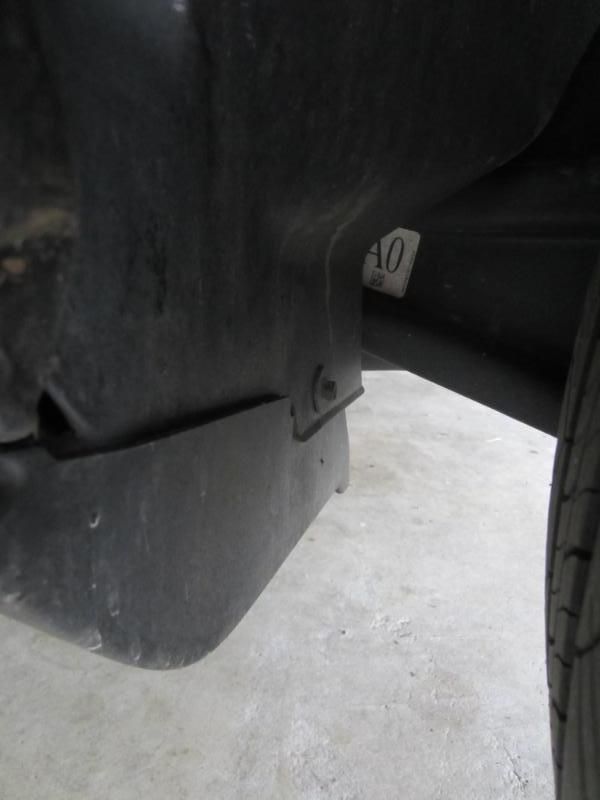
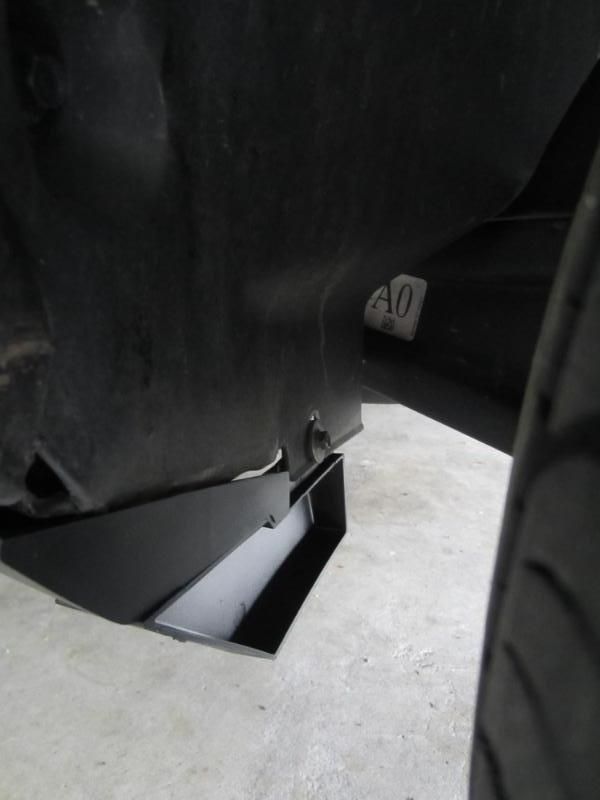
If you're working on the left side, turn your wheels full lock to the right for access to the splash guard, this shows three of the screws to remove from the left splash guard, there is another one in the back that you can't see and another one below:
Splash guard removed:
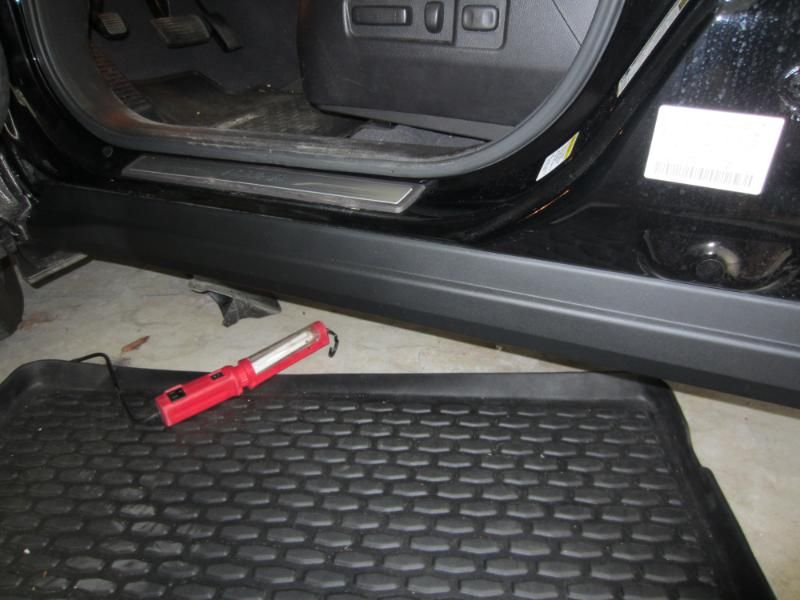
Next is to remove the sill panel or trim piece along the side, and as a start you need a flat head screw driver or clip removal tool to pop these clips out:
Remove screw at the rear of the panel:
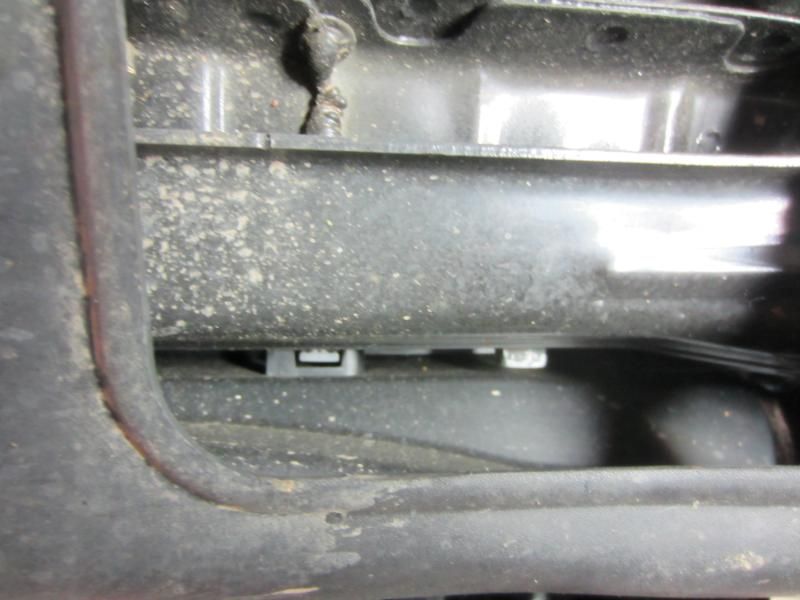
Then use your flat head or clip removal tool to unfasten this white lip from the underneath (it's the white thing on the left). It is located towards the front of the trim panel, it is the first clip essentially. It's pretty tight, so don't be afraid to put some juice on it, front of the car is to the right in the picture:
Now once that first clip is undone, the instructions say to pull the front part of the panel out and slide the entire panel piece forward to disengage from the remaining clips in order to remove. What they don't tell you is that the clips hold the panel in pretty well, so you really have to tug hard on it (forward, not out) in order to get it out. The first I did took me forever because I wasn't sure how much force to exert.
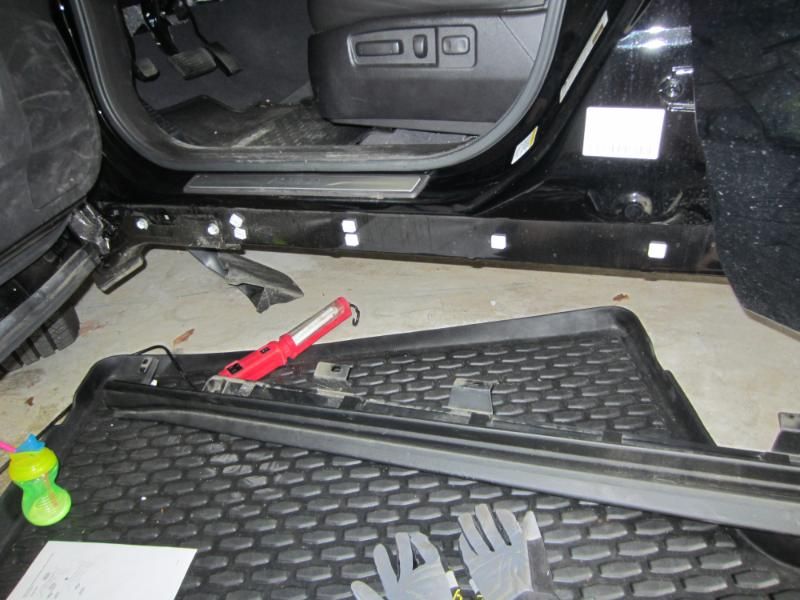
Once the piece is out, you'll see all the white clips used to hold it in place (don't mind the manly beverage), and these are to be removed because the new sill panel comes with its own clips:
Another noteworthy point - the new sill piece has the same white clips, but during shipping, some of them may fall off out of their brackets because they are just slid on. Inspect your sill panel to make sure every bracket has a white clip. If not, look around the plastic bag the trim came in or in the box to see if any have fallen out and replace where necessary. If you have a few missing that really are lost, you can always reuse some of those you just took off the car. It's not a huge deal, but if one of the white clips towards the ends of the trim are not in, it may not stay nicely against the car. If it's one of the middles, it probably doesn't matter that much. Once the panel is on the car, it's a pain to get it off if you want to reinstall a missing clip
Per the instructions, press in the new panel, making sure all the clips are pressed in firmly and that everything clicks in place. Reuse the screw at rear that was removed previously:
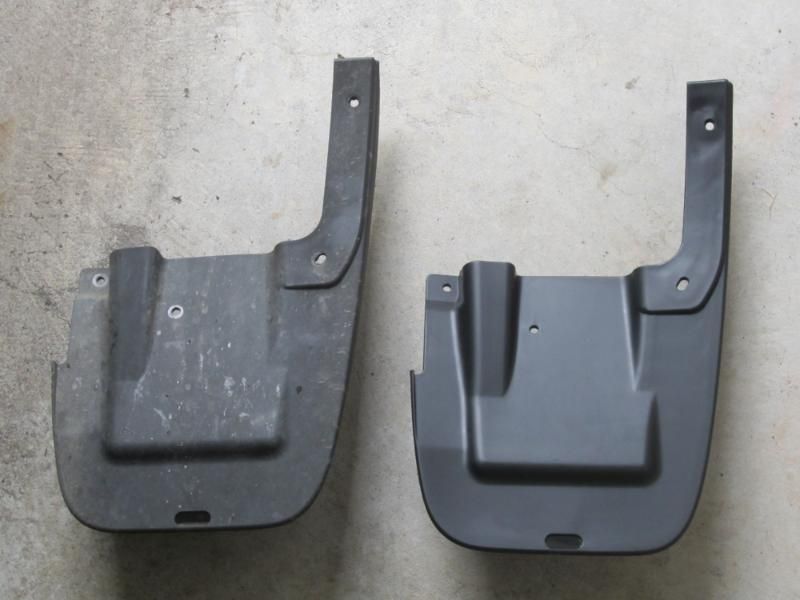
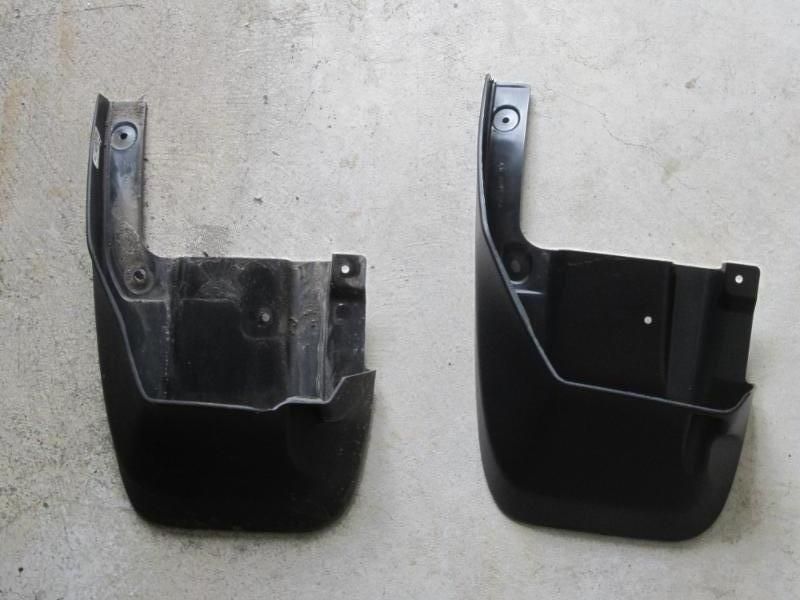
The running boards came with new splash guards, pretty similar really:
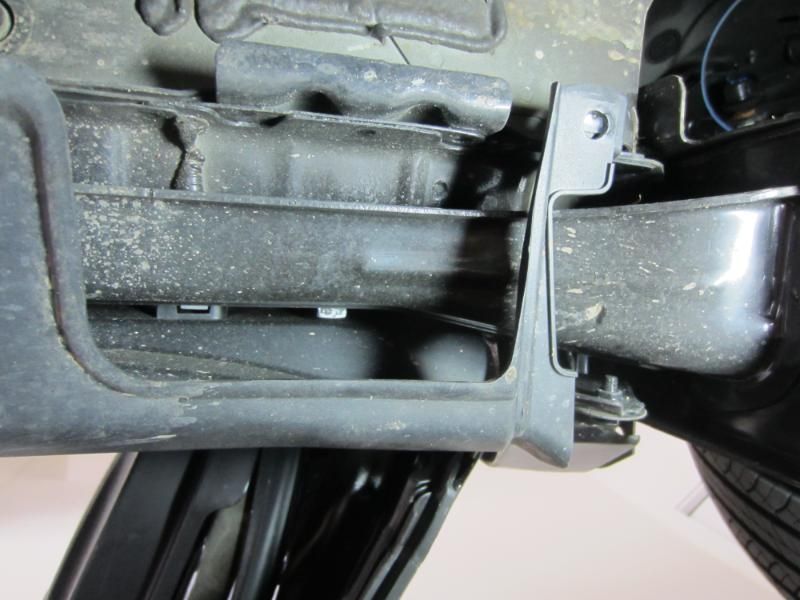
When attaching the new splash guard, it does help to tighten in the order than the instructions say to use. Also, make sure the splash guard is seated properly around the end of the sill panel (and yes, I should have cleaned the car first):
Now for the brackets and running boards. Previous threads/posts on the install say that it is easier to install the brackets on the boards first, while the instructions say to install the brackets on the car first. When I did these for my Pilot, I did brackets on car first, then propped the boards up on small boxes and was able to secure them to the brackets with no issues. In this case, I decided to try the brackets-on-boards method first, and it worked as well, but either way you choose to do this, you need either a second set of hands or something else to help hold the boards up to the car while you bolt things down. The one thing I did differently this time was that I found it was easier to attach the front bracket on the car first, and the rear two on the board. That way, along with using my tool box to prop the board up in the rear, there is support for the board when you go to bolt it up.
Nothing really interesting in this picture, just shows the brackets attached to the board beforehand:
Another tip to note, all the brackets have slotted holes both to attach the brackets to the car and to the boards themselves. If you are picky like me, and want the boards perfectly parallel with the edge of the car/sill, you'll need to make sure that when you tighten everything down, everything is in line. The slotted holes make that challenging, but I basically pushed everything, bracket and boards, inwards, as tight to the car as possible, then tightened everything up. That worked for the right, but not the left, which was slight crooked with the rear out more than the front, so I loosened the hardware and slid the front out a tad (since the slotted holes allow for a little adjustment) and retightened to get everything parallel.
Finally, the instructions say to center the boards based on measurements from the sides and middle. However, since my boards are really for my 6 and 3 year olds to climb in and out of the car, I slid them as far back as possible and bolted it down that way.
Before:
After:
I'll have to get better pictures once the car is cleaned up, but you guys already know what an MDX with running boards looks like.
Hope someone else finds this useful.

The following 3 users liked this post by Puppetmaster:
 04-09-2012, 02:02 PM
#3

Very nice write-up. We made the purchase/install of the Advanced Running Boards on our '11 a part of our total buy package. These definitely give your X a new look and are very practical if you have small kids who need an extra step to get in and out of the door.
04-09-2012, 02:30 PM
#4
Burning Brakes
Thread Starter
Thanks, hopefully it'll come in handy for anyone else doing the install. In addition to the money savings, these are also installs that I like doing myself for fun and personal satisfaction.

Trending Topics

 04-20-2012, 07:25 AM
#12
Burning Brakes
Thread Starter
04-20-2012, 07:27 AM
#13
Burning Brakes
Thread Starter
The Sport style looks good on the M5, but I didn't think that the straight, narrow look flowed well with the MDX. The Advance boards, to me at least, match the styling of the car better. Also, bigger boards are usually better when you have little kids. 
04-20-2012, 07:29 AM
#14
Burning Brakes
Thread Starter
https://acurazine.com/forums/members/oemacurapartstim-283146/
04-20-2012, 07:31 AM
#15
Burning Brakes
Thread Starter
Thanks for the responses, everyone. Glad it helped some of you. Not sure how many more DIY additions I'll be doing to the MDX, but I'll be sure to document them if I can.
04-20-2012, 10:19 AM
#16
04-24-2012, 09:30 AM
#17
Burning Brakes
Thread Starter
04-24-2012, 09:41 AM
#18
05-10-2012, 09:08 AM
#19
Finally got the advance boards on last night. Took me about 3.5 hours but it was a lot easier than I thought it would be. They look great and complete the look of the car. I am glad I went with the advance since they are just wide enough to be used as a step, anything less and it wouldnt be functional.
05-11-2012, 01:14 PM
#21
Burning Brakes
Thread Starter
Finally got the advance boards on last night. Took me about 3.5 hours but it was a lot easier than I thought it would be. They look great and complete the look of the car. I am glad I went with the advance since they are just wide enough to be used as a step, anything less and it wouldnt be functional.
06-11-2012, 12:19 PM
#22
MATT
nice write up and thanks for sharing....i plan on getting these from tim also for my mdx that i just picked up....these do flow the best IMO over the other choices
07-03-2012, 08:43 AM
#23
Burning Brakes
Thread Starter
No problem, glad to help.
I also realized that these are handy in helping to load and unload the rooftop cargo box we use from time to time.
I also realized that these are handy in helping to load and unload the rooftop cargo box we use from time to time.
07-03-2012, 02:21 PM
#24

Great write up. I appreciate it. Just ordered my '09 CPO MDX and waiting for delivery on Friday. They wanted $900 to put on the boards. With your write up and a couple of Micheladas, I will be able to keep my pregnant wife and future child happy.
I will order them from Tim or a local dealer that has a comparable price.
I will order them from Tim or a local dealer that has a comparable price.
01-28-2013, 08:30 PM
#25
2nd Gear

Join Date: Jan 2013
Posts: 2
Likes: 0
Received 0 Likes
on
0 Posts
Thank you for this write up. I plan on purchasing the Advance running boards as well.
How well is it holding up?
My father has a Honda Pilot with almost the same running board:
http://automobiles.honda.com/pilot/a...ory=PILOT13016
The plastic part where you step on has started peeling up/warping creating a gap between it and the bar.
I am a little concerned that the same thing will happen.
Obviously I plan on installing this myself, so no warranty coverage if anything happens.
 12-11-2015, 08:26 AM
#27
mrgold35
 12-11-2015, 11:41 AM
#29
mrgold35
After looking further at the Acura online e-store, it also gives you the pdf installations for accessories from 2003-2016 Acura's: Link: Acura online store - Select your vehicle to view the installation or DIY instructions for an Accessory
The following users liked this post:
SQLnovice (12-11-2015)

Thread
Thread Starter
Forum
Replies
Last Post
Soul_Deamon
Audio, Video, Electronics & Navigation
7
11-13-2018 04:44 PM